Creating an animation
Overview
Creating a Geppetto Animation is a 5 step affair.
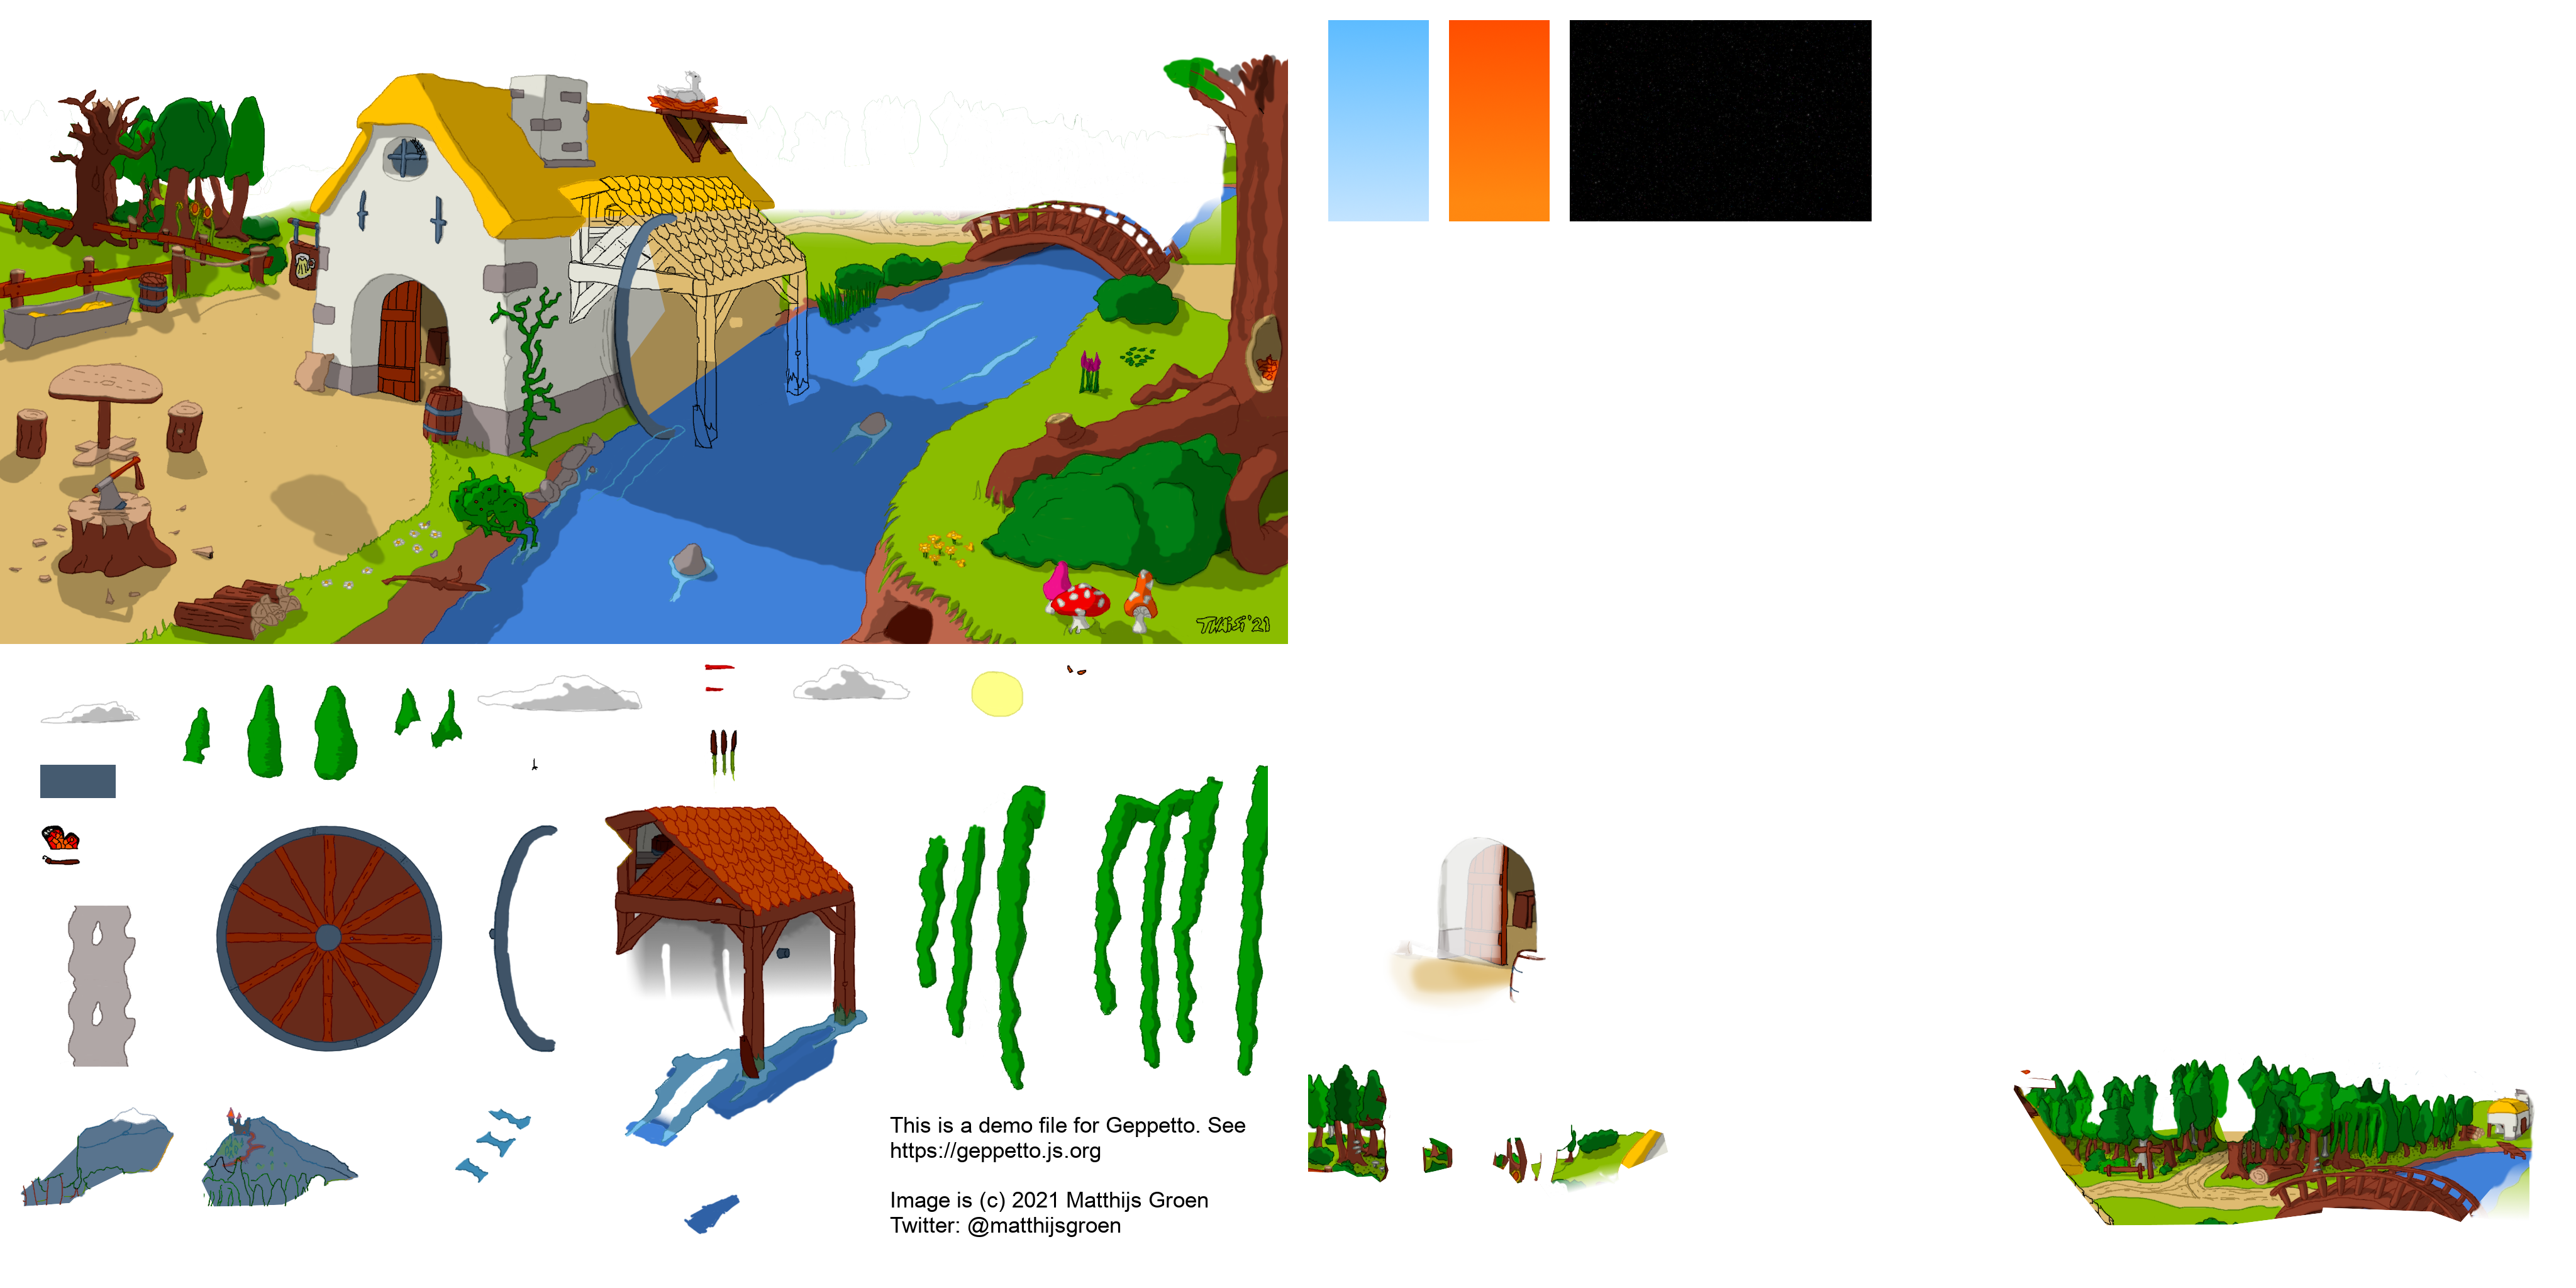
Create a texture image. This is a flat
.pngimage with all the layers you want/need laid out next to eachother. Ideally this file has a size in the power of 2, but this is not required.Import this image in the Geppetto Studio app, and define the layer vertices and stacking order of the layers.
Add mutations to layers and layergroups using the "composition" screen of the Geppetto Studio App. This allows layers to move, become transparent, bend or rotate.
Add controls to manipulate multiple mutators at once, and determine minimum and maximum mutation values, so that movements or effects can not go haywire.
Using the controls of step 4, you can define animations on a timeline, and add moments of events to them. These "events" you can use in the player to add sound effects to your animation, or trigger other animations based on the moment of the timeline.
Creating a texture
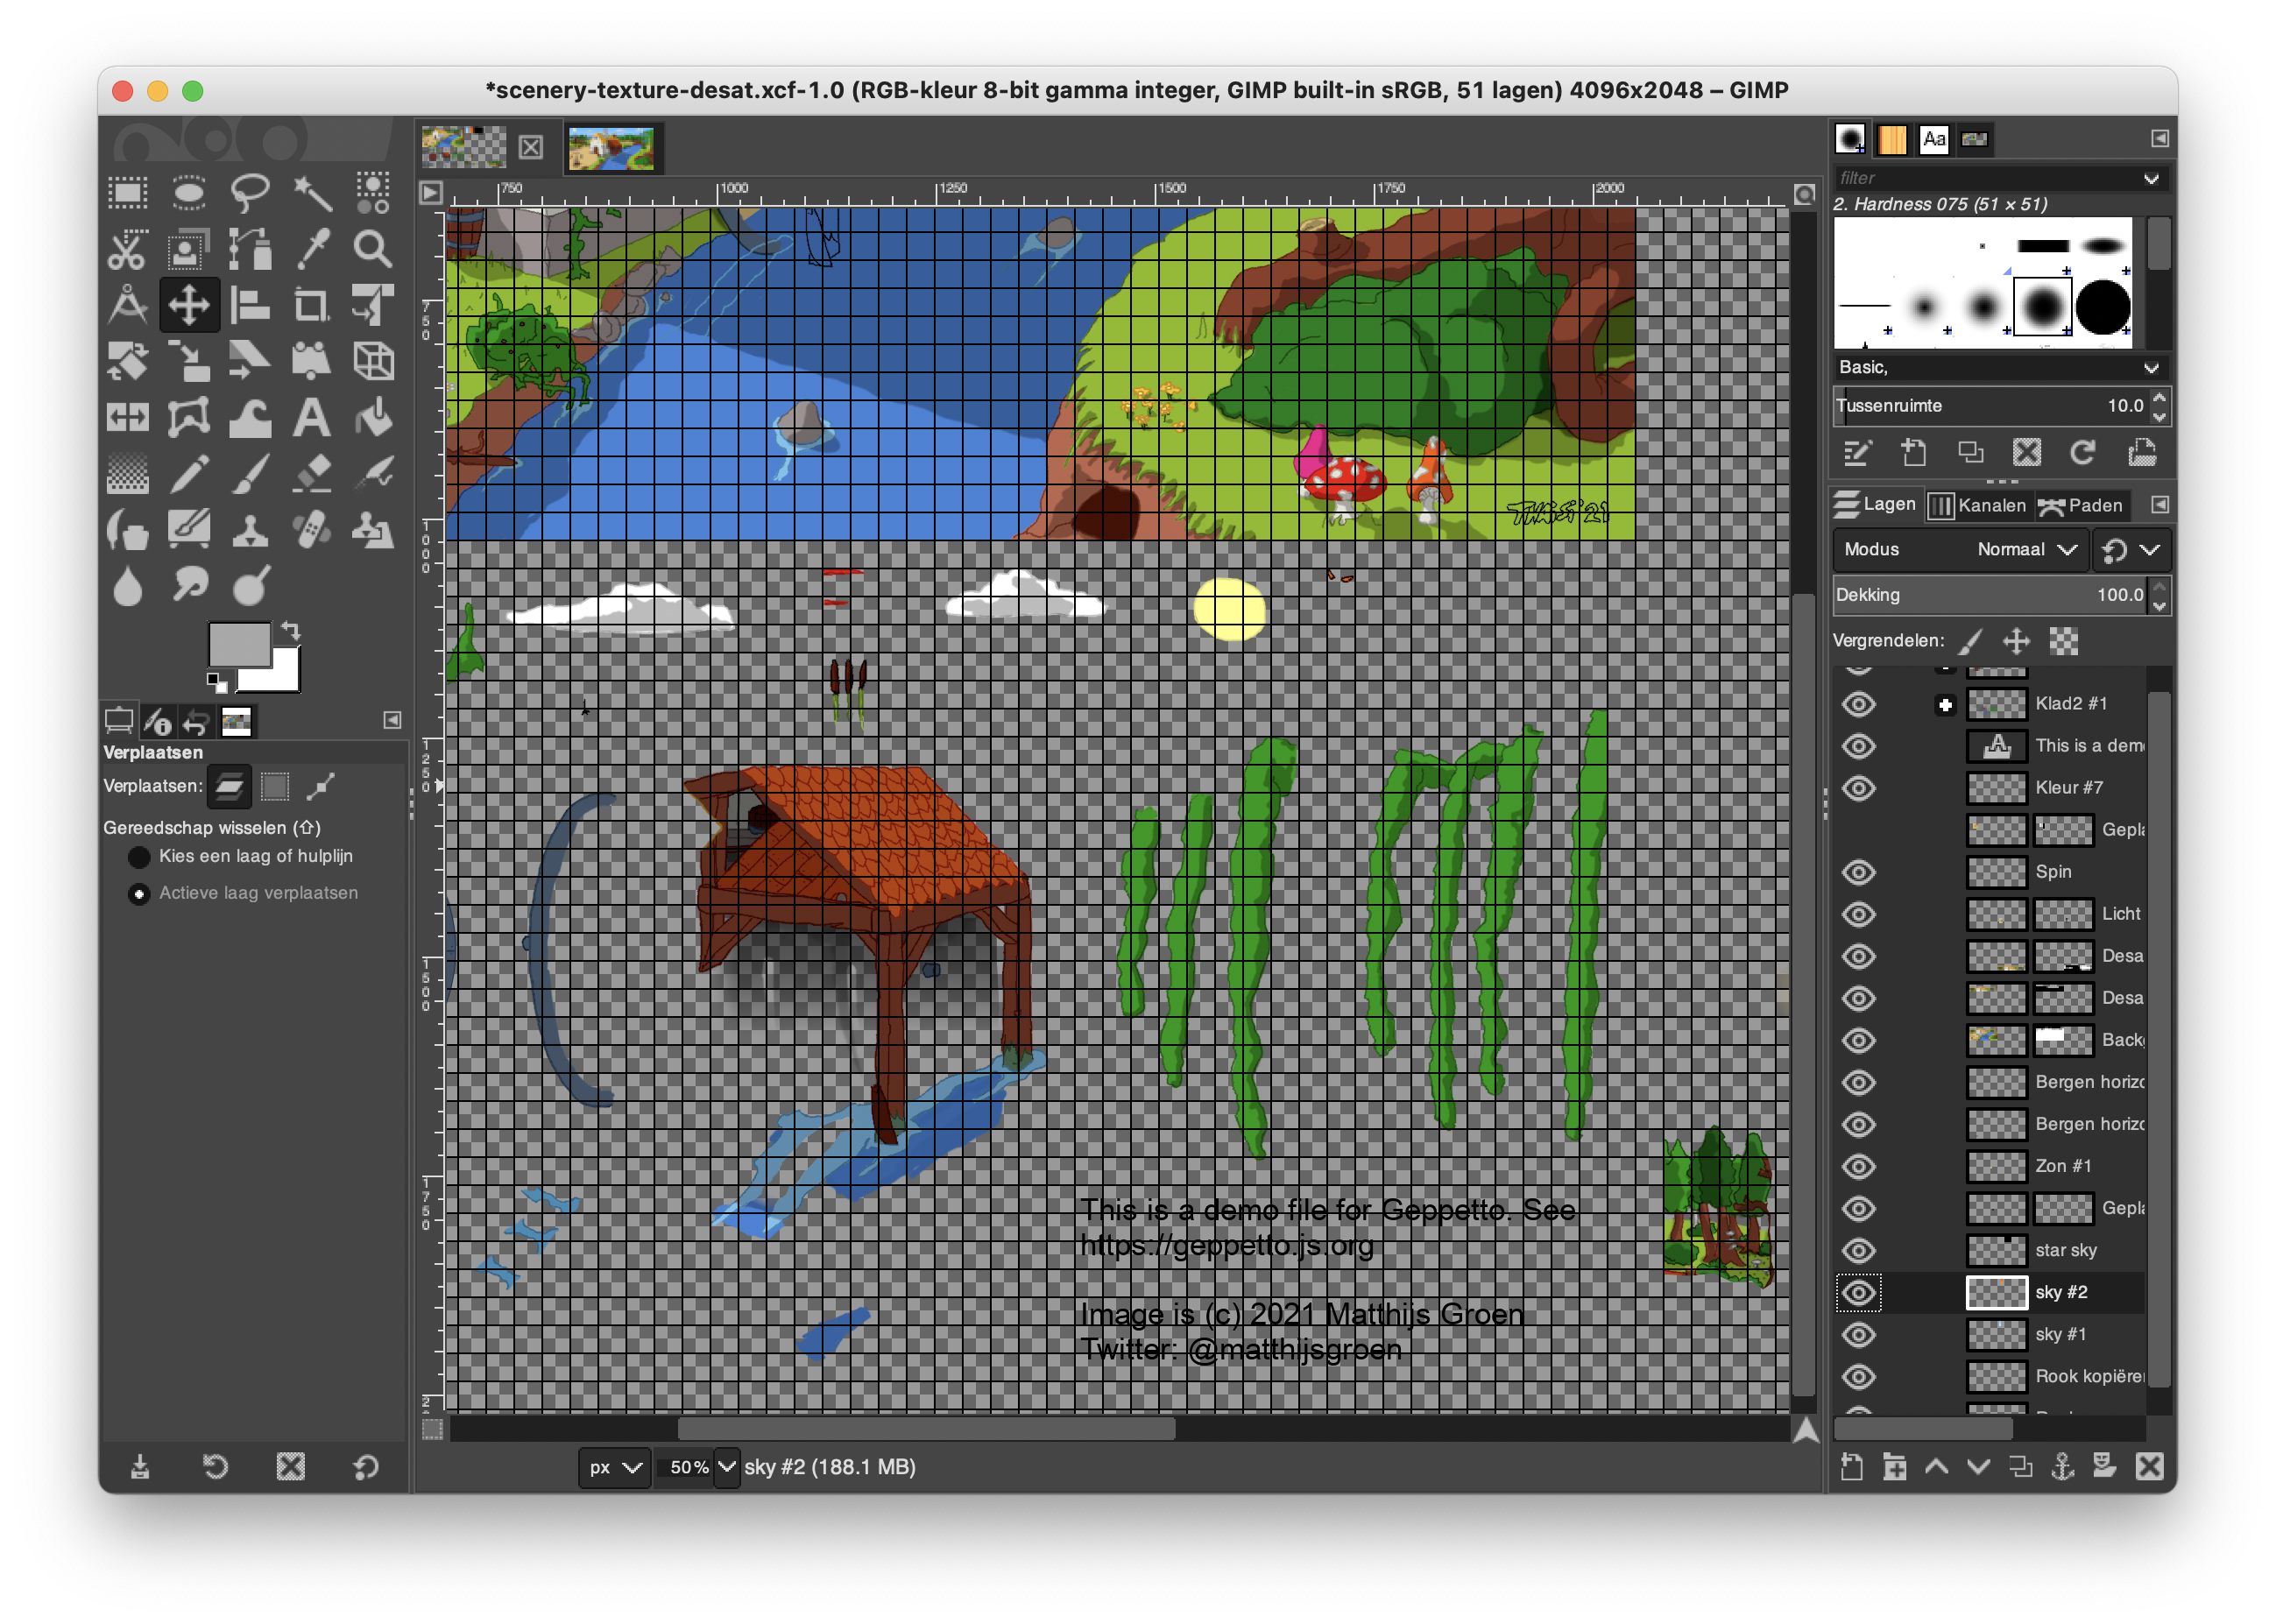
- Create a texture file (a 2d image file, for instance .png). You should use a digital paint program for this. For instance Photoshop or The Gimp. Make sure you put the layers you want next to eachother in the flat image, you can make them stack again within the Geppetto Studio app.
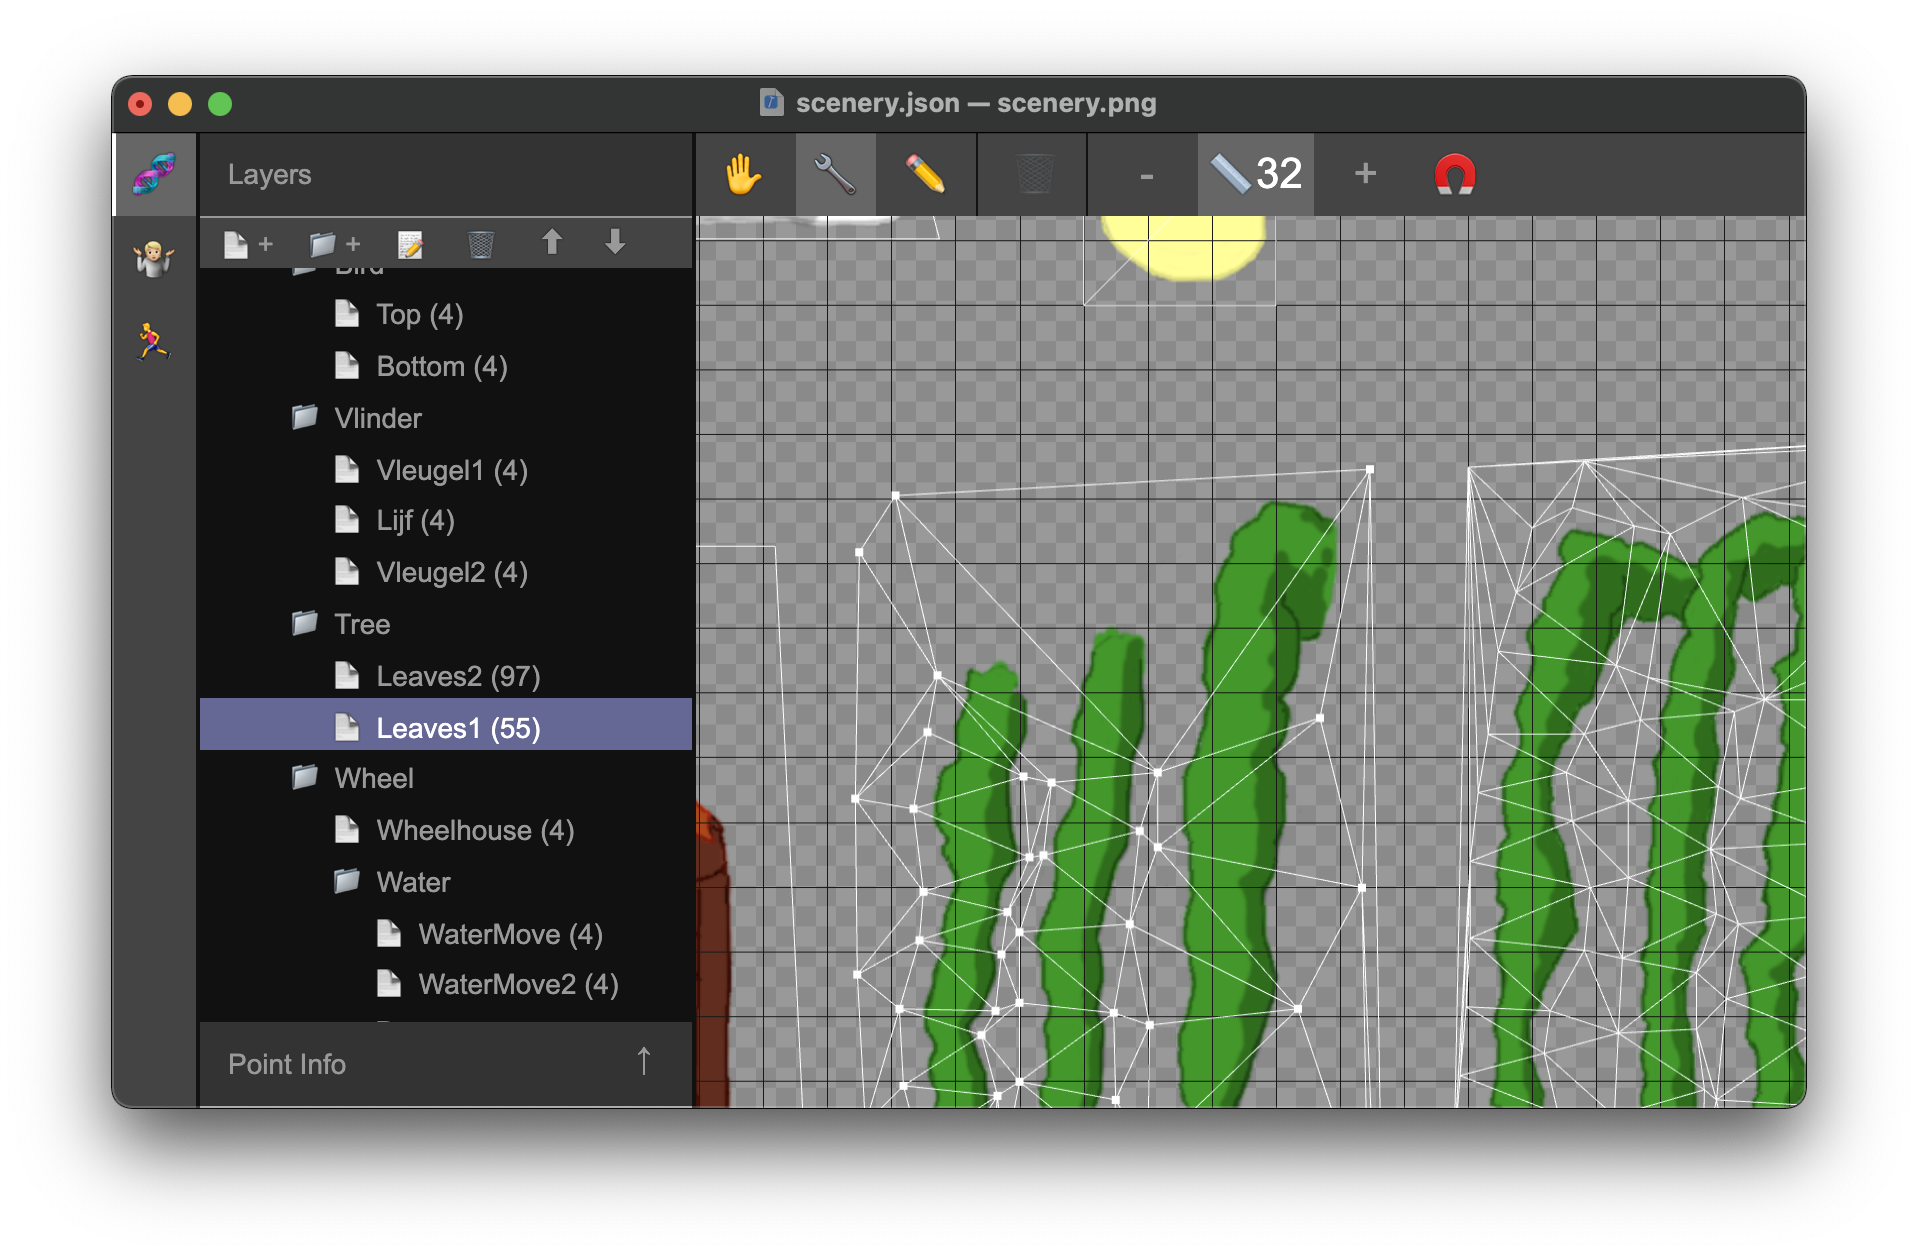
- In the app, you'll load in this texture and create shapes from the 2d texture, in the Layers screen. Each shape is build by placing points, that gets automatically triangulated into a shape. The location you place the points can be important, since the goal of the mutations is to move these points around, causing the texture on the shape to move, stretch, rotate or bend.
- In the composition screen, you can stack and move the layers to form your intended picture. The order of layers is also the stacking order.
Creating layers

The layer screen is where you create layers from your texture.
In the composition screen you can then stack te layers to make items move across of eachother.
- Create a new file: Ctrl/Cmd + N (or File -> New from the main menu)
- Load your texture file: Ctrl/Cmd + Shift + O (or File -> Load Texture from the main menu)
You should now see your texture file in Geppetto. In the "Layers" pane on the left, you can manage the layers:
📄 +Add Layer📁 +Add folder📑Clone current selected layer🗑Remove the current selected layer, or an empty folder⬆Move layer/folder up⬇Move layer/folder down
If you add a new layer, you'll see a (0) appended to the layer. This is the
amount of points the layer contains. You must have at least 3 points in a layer
to create a surface.
Rename layer
To rename a layer, you can double-click on the layer/folder, and enter a new name.
Creating a surface
With a layer selected, you can switch from edit mode. The edit modes are listed on top of the central area:
✋Move mode. By pressing and holding the mouse you can move the texture.🔧Select mode. In this mode you can click on a point without adding new ones, to allow editing of its location, or remove it.✏️Add point mode. By clicking in the texture it will add a point to the layer. The points are automatically connected to other points in the same area, forming triangles.
The active selected point will display a larger block than the others. When a
point is selected, you can see (and edit) its coordinates in the "Point info"
pane in the bottomleft. You can also delete the selected point by using the 🗑
on top of the center area.
When mutating elemements, they will move the points of a surface, making the image move. So placing extra points in your surface can imporove movement effects.
Using the grid
You can enable a grid to more easily place points. Using the - and + buttons in the toolbar, you can increase / decrease the raster size. By clicking on the size, you can toggle the visibility of the grid, and by clicking the 🧲 icon, you can make the grid magnetic, then all new points will automatically be placed on raster edges.
Making the image 'move'
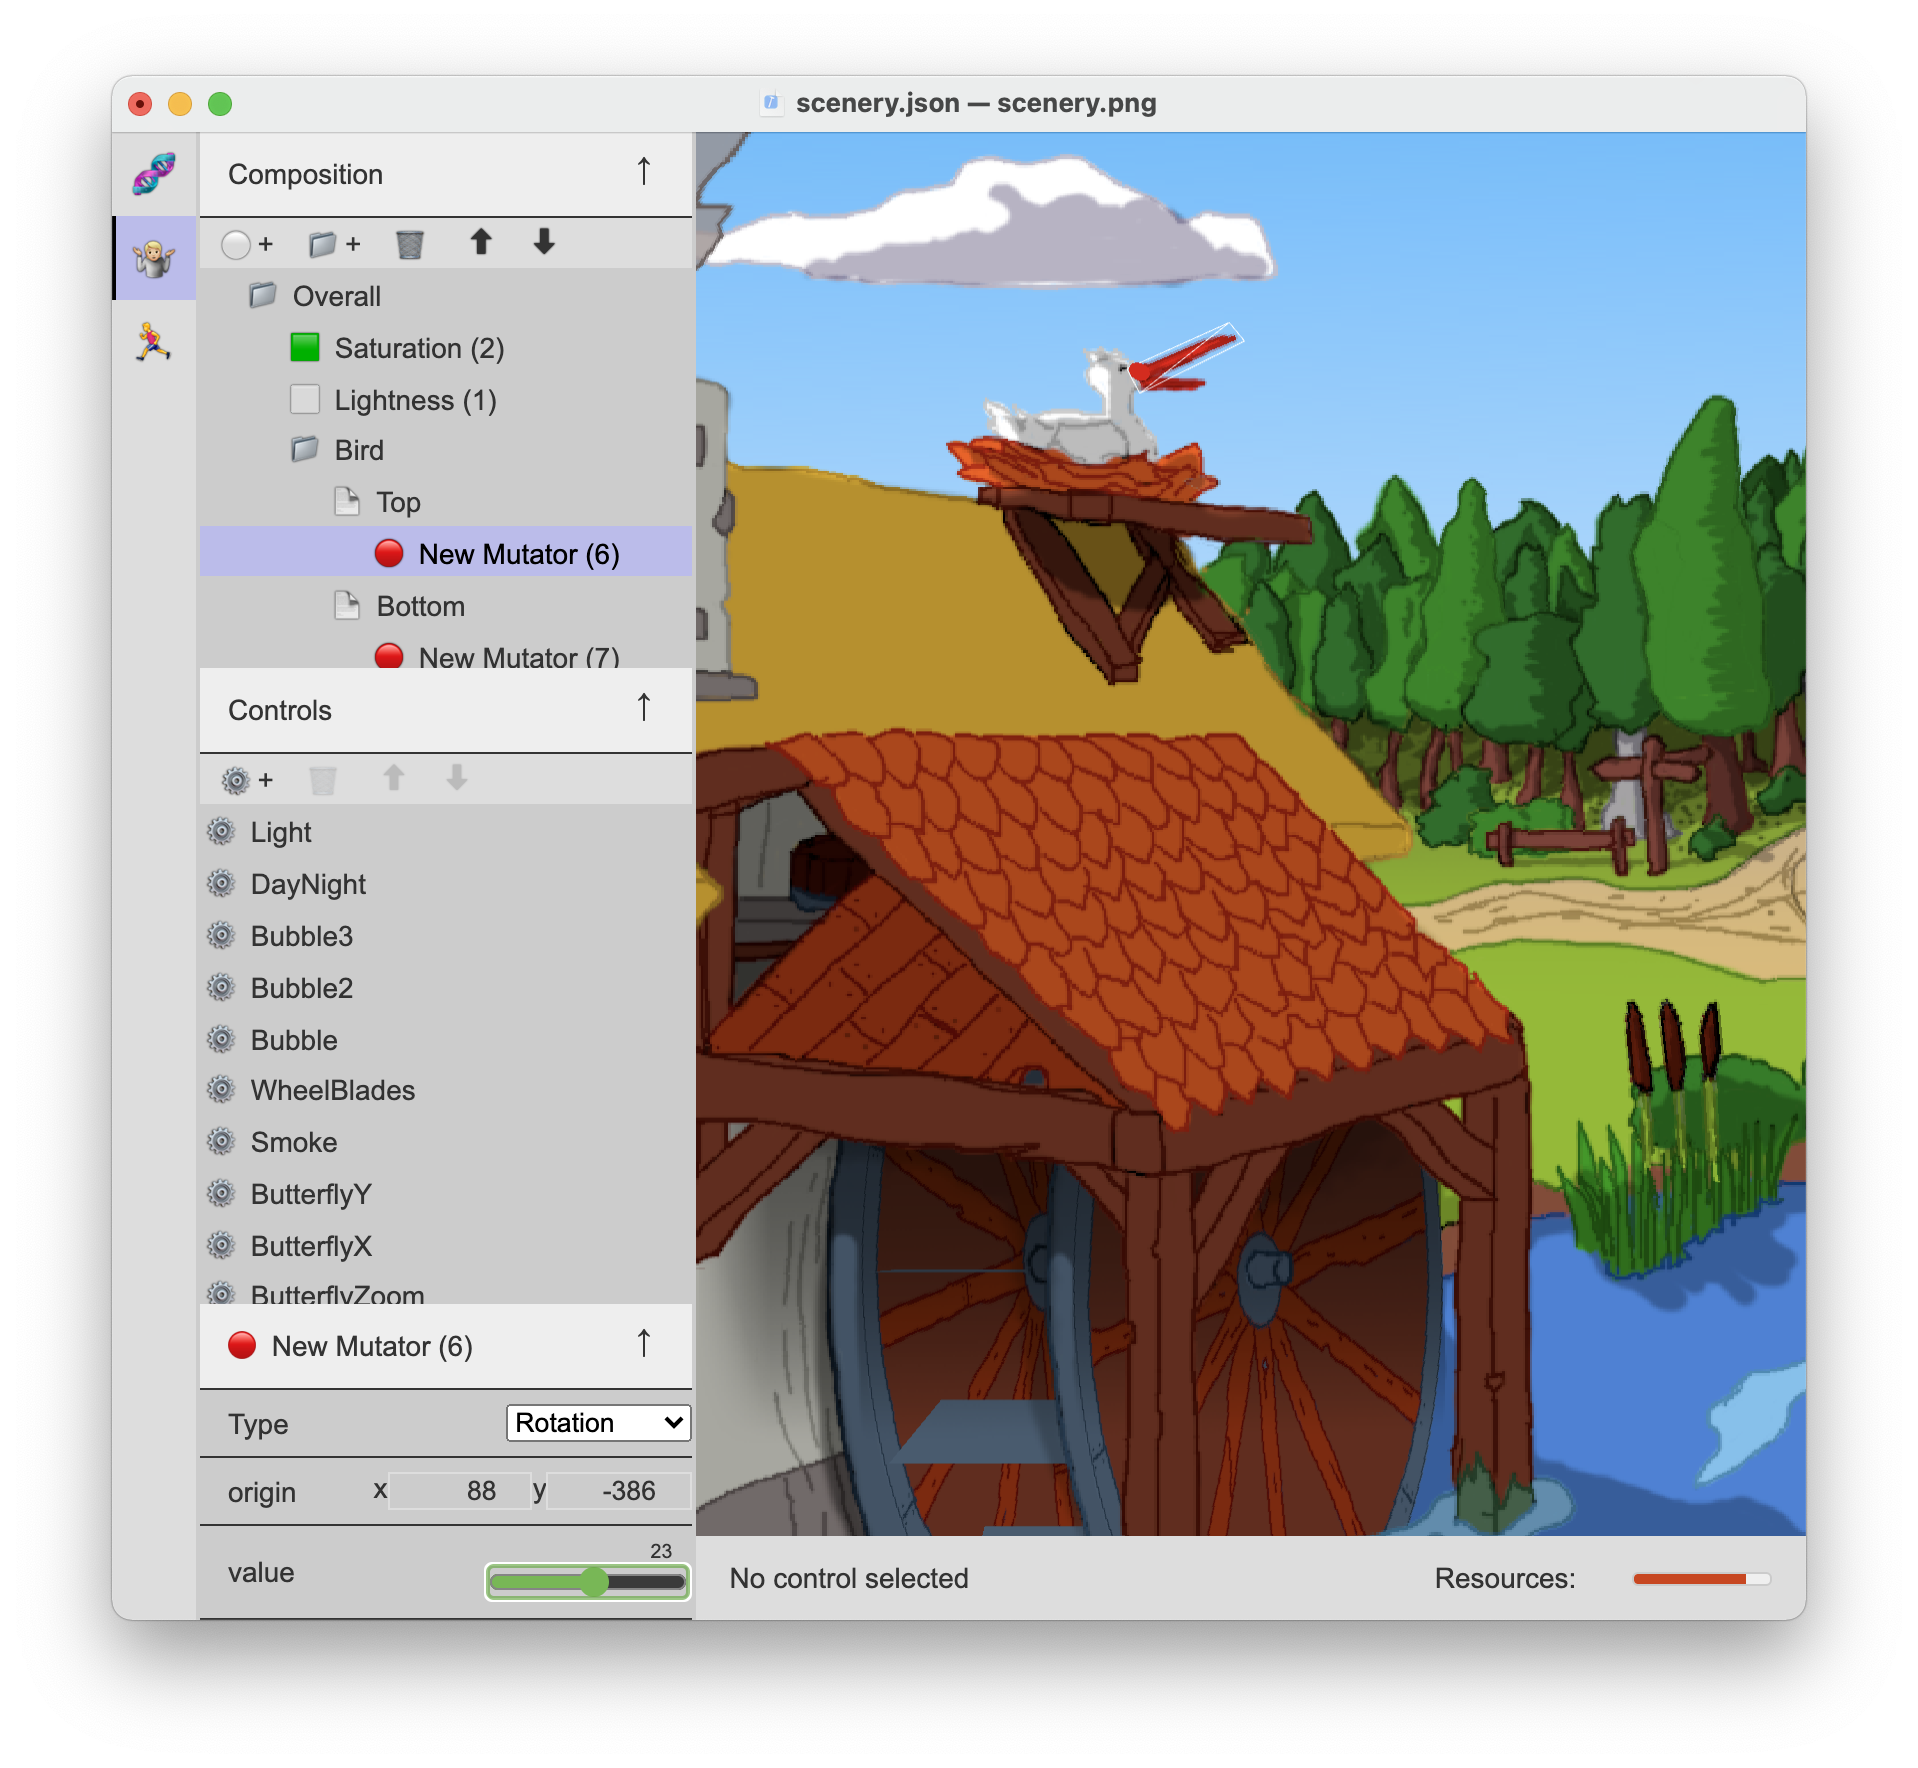

The composition screen is where you wire up all the moving parts of your image.
It has the same tree structure on the side as the layers. You can move the layers and folders here to change the stacking order of the layers.
Moving layers
By default, a layer is positioned with its center to the center of the image. So if you create all the layer surfaces in the layer screen you will notice that they are stacked on eachother at the center.
When you select a layer from the tree on the left, you can move the layer around by holdin Shift while dragging. (This also works for folders).
For precision movement, use the pane in the bottom left, which should have the title of the layer as name. There you can manipulate the X and Y by entering new coordinates, or using the up/down arrows.
Adding mutations
In the "Composition" pane on the left, you can reorder layers, place them in folders and add mutations:
⚪️ +Add Mutation to selected layer or folder📁 +Add folder🗑Delete the selected mutation or an empty folder. You can only delete layers from the Layers screen (on purpose).⬆Move layer/folder up⬇Move layer/folder down
Each mutation type has a different effect on the surface(s) they are applied to. When you add a mutation you will see a colored dot added to the center of an image. This dot is the 'origin' of the effect. (For instance the point of rotation). You can move the origin by using Shift while dragging with the mutation selected, or by adjusting the origin manually in the bottom left panel.
🟢 Translation mutation
The green circle means translation. With the translation mutator, you can move the layer or folder. If you enable the radius option, only the points within the radius around the origin are moved.
🔴 Rotation mutation
The red circle means rotation. You can use this to rotate a layer or folder around its origin (The red dot).
🟣 Stretch mutation
The purple circle means stretch. You can stretch all points of a layer or folder using the origin as center of the stretch. 1 is the default size, 0.5 is half (scale down) 2 is double the size (scale up). You can use negative values to mirror surfaces.
⚪️ Opacity mutation
The white circle means opacity. You can change the opacity of an entire layer or folder. The origin is changeable, but it will not affect the result.
🟠 Deformation mutation
The orange circle means deformation. It is like translation with radius, only its effect will linear decline from the origin towards the radius.
⬜ Lightness mutation
The white square means lightness. It can be used to make colors darker.
🟧 Target color mutation
The orange square is to set the color as base color for 'Color Transition' effects.
🟩 Color transition mutation
The green square is to transition the colors towards the 'Target color'. If no target color is specified it will transition to greyscale.
Adding Controls
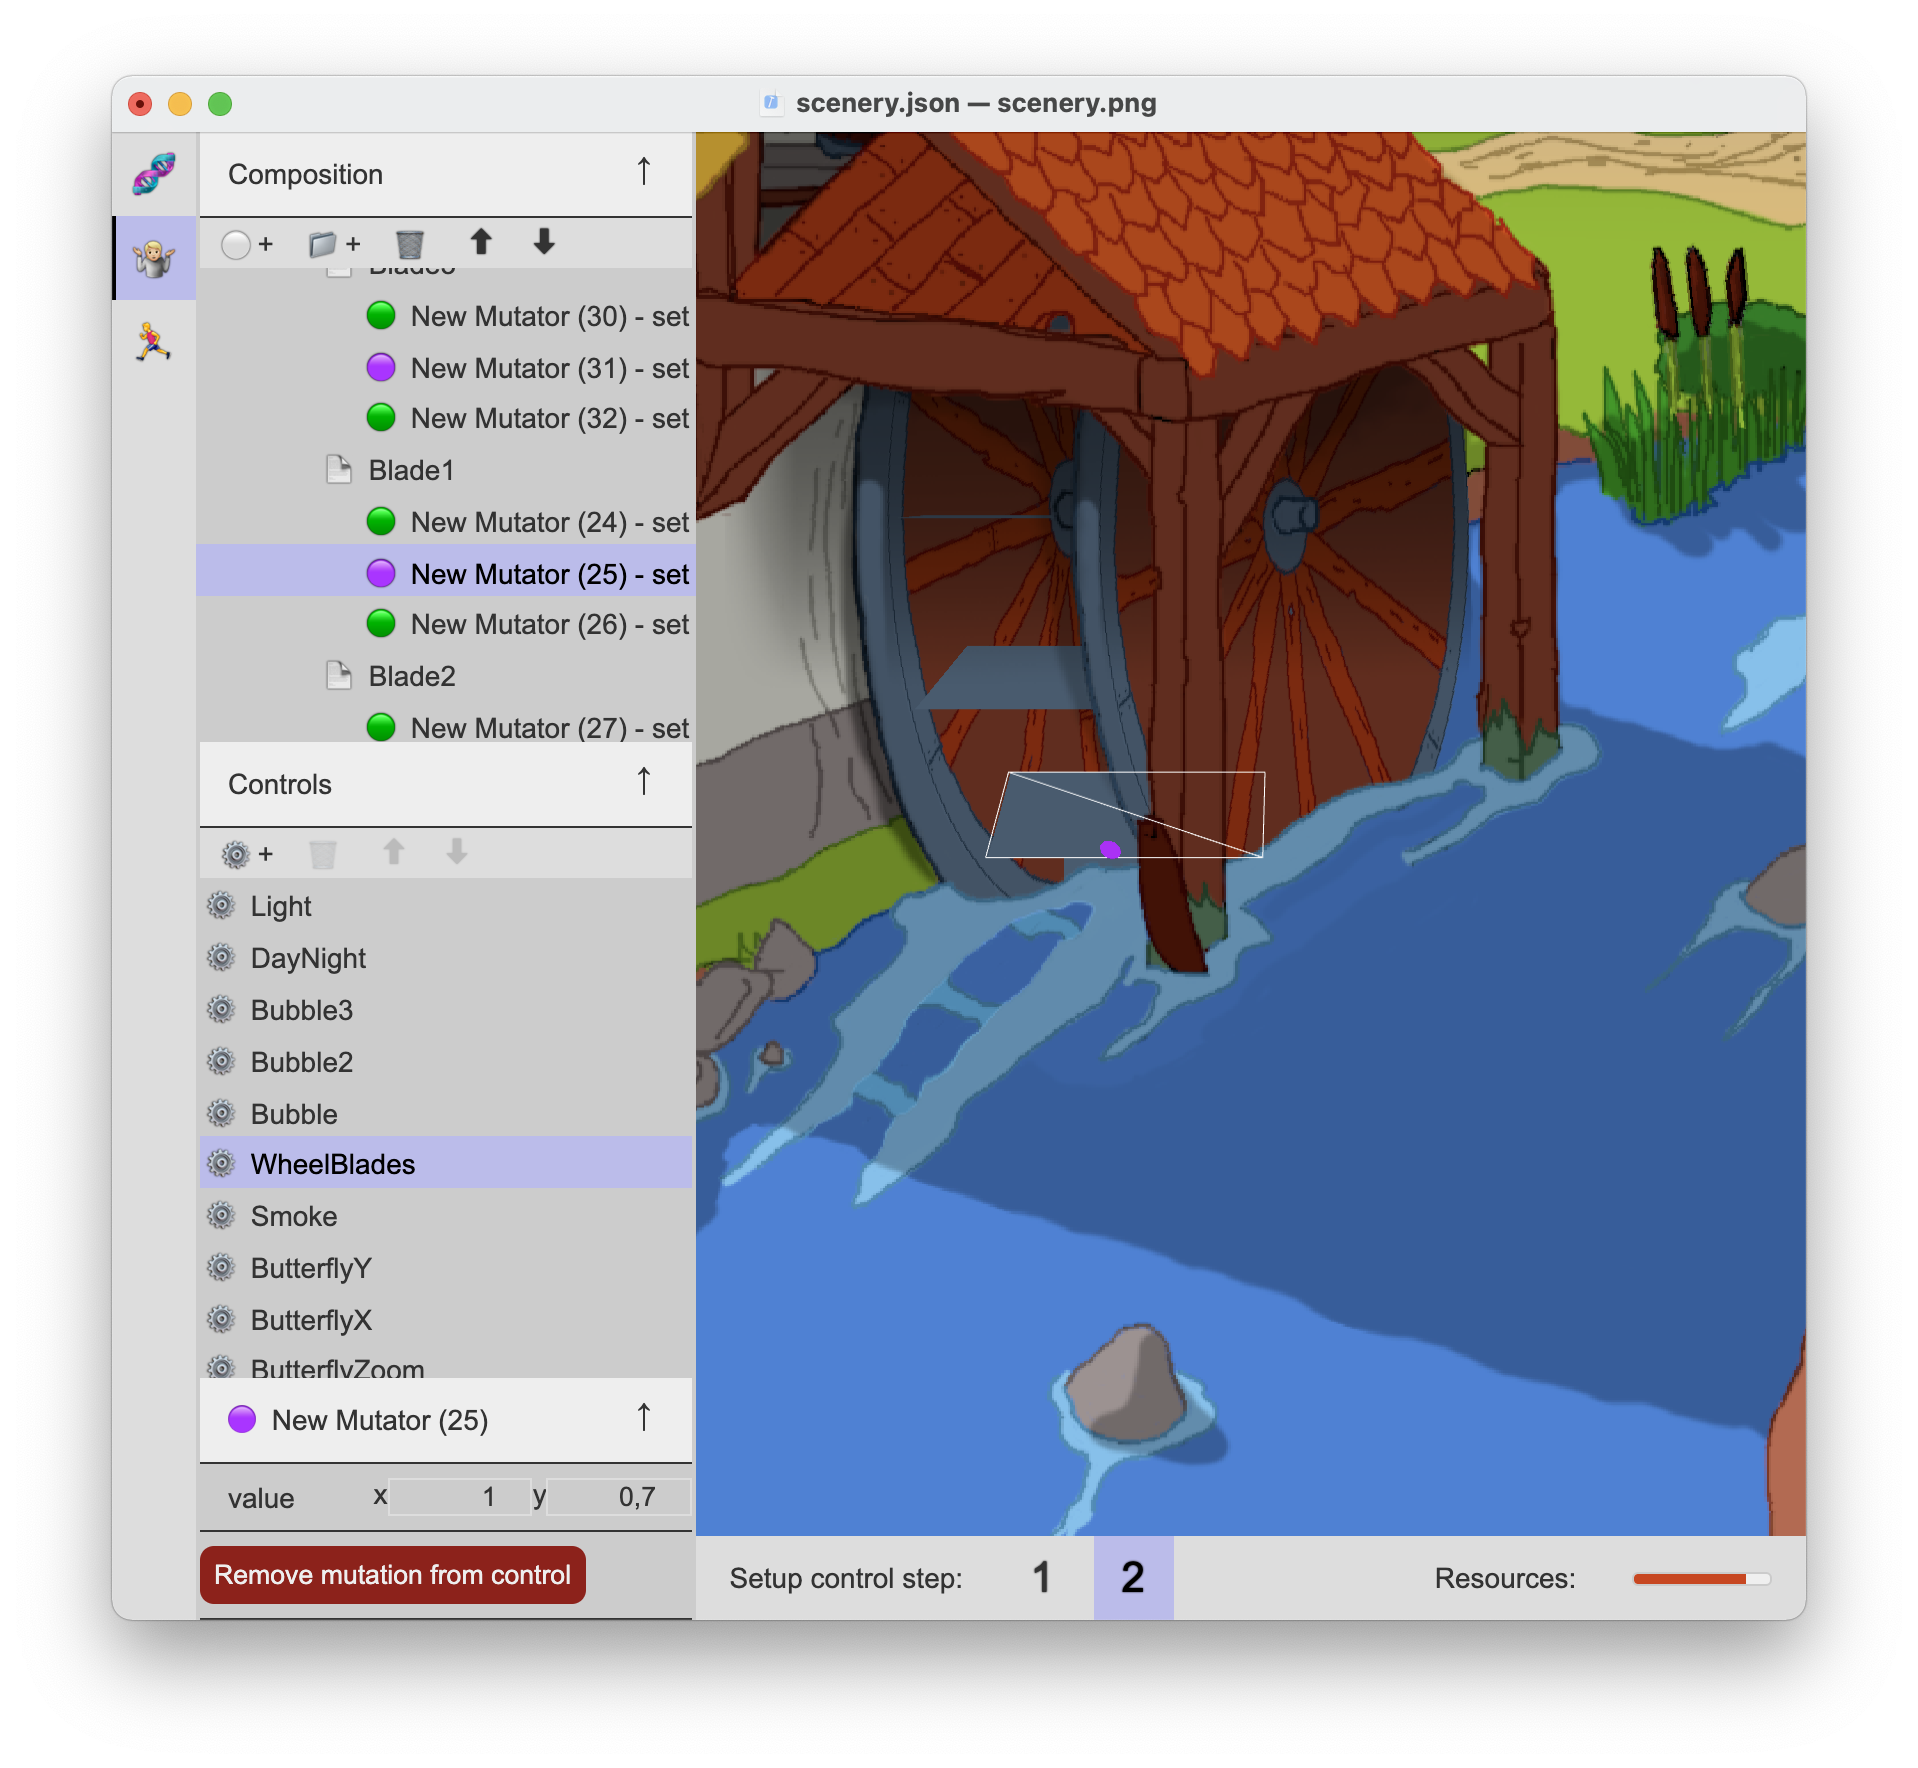
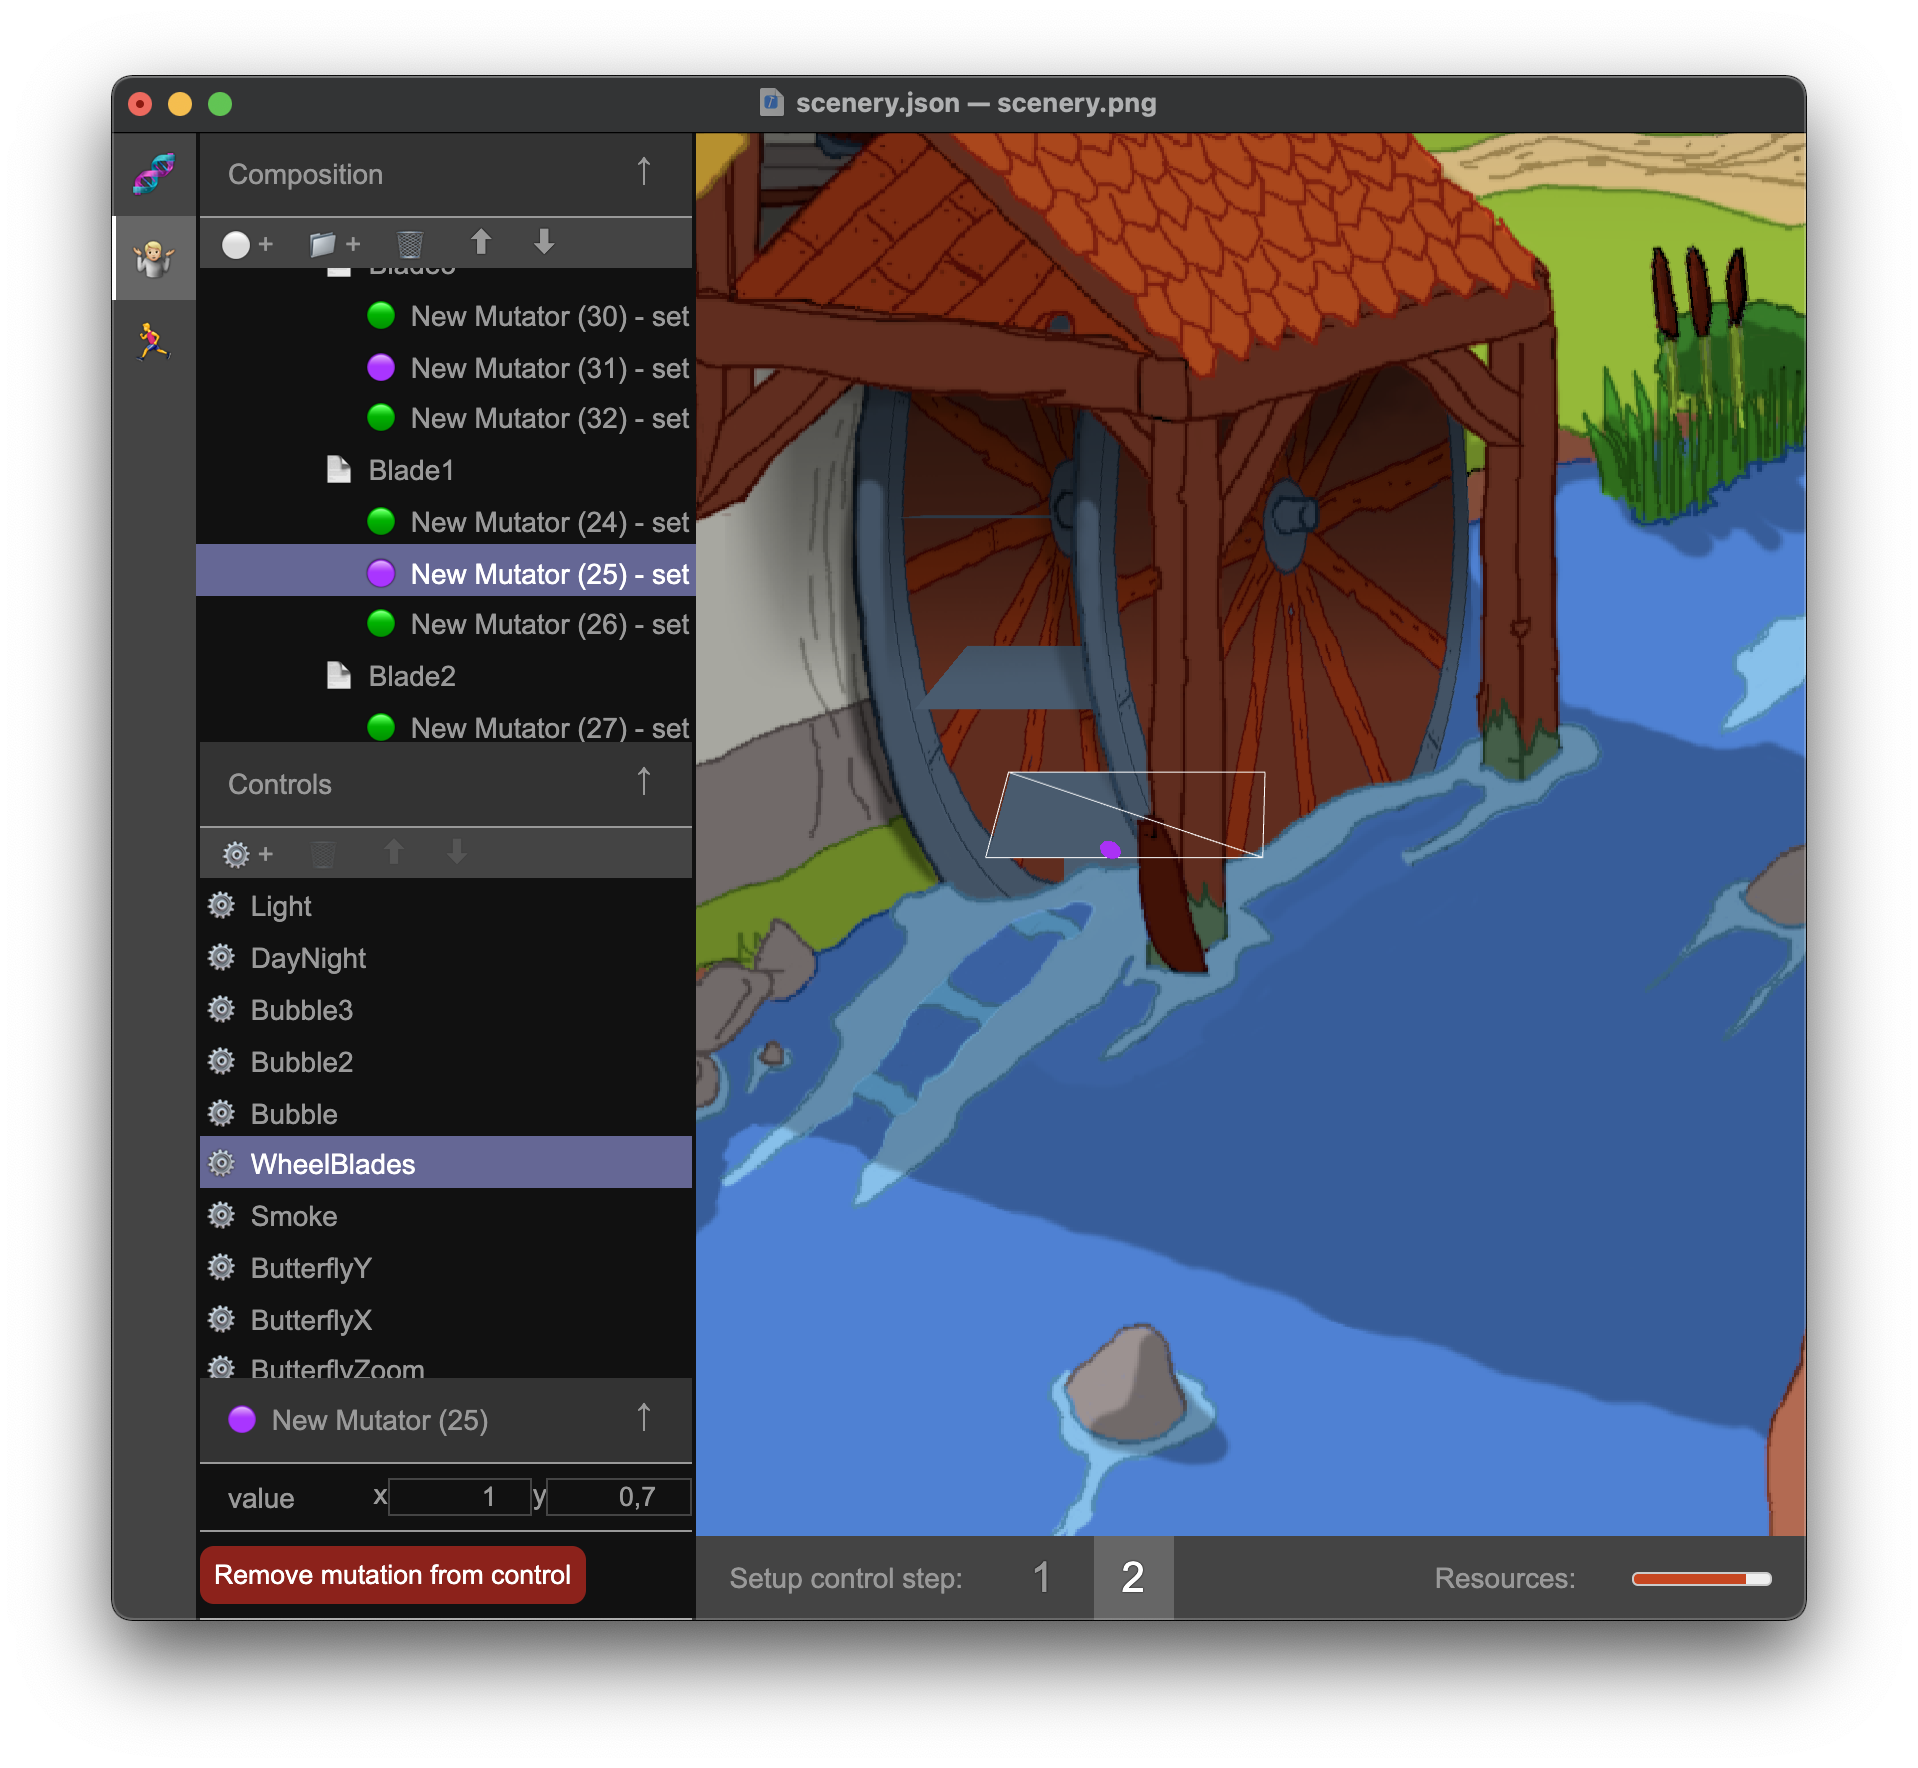
Controls allow your image to be controlled from the outside, or by an animation. A control has 'steps', each step is a set of values for mutations. By using controls, Geppetto will transition these mutations when the controls are changed.
You can add a control in the panel called "Controls".
⚙️ +Adds a new control🗑Removes selected control⬆Moves control up in the list (has no functional effect⬇Moves control down in the list (has no functional effect
A Control has a set of steps you can see them as frames where interpolation happens between them. The minimal amount is two. To set values for a control, select a control, then select the step you want to update using the numbers in the bottom of the screen, under the image. Next you select the mutation you want to add or update, and select 'Add mutation to control' from the bottom panel. You can also set a value there.
Multiple controls can make adjustments to the same mutation.
In case of 'Translation', 'Rotation' and 'Deformation', the different mutations are added to eachother. For 'Opacity' and 'Stretch' the mutations are multiplied with eachother.
To stop with the 'step adjustment' mode, just click the currently selected step again.
Resources
Mutations and Control use WebGL Resources. Specifically 'Vertex Uniforms'. This way the whole mutation process can happen on the GPU, making sure the animation is fluent, and freeing up the CPU for JS execution. Animations are done on the CPU and do not affect this resource usage. At the bottom right of the screen, there is an indicator how many of these 'Vertex Uniforms' are used. There is an upper limit of 512 in there. This is the limit of an iPhone. Android devices, Chromebooks and Desktop PC's, typically have a limit of 1024 or higher.
If you are playing multiple files at the same time, take into account to stack the resource usage. Always make sure to test the animations on the devices you want to support.
With mutations and controls added to your image, you are ready for animation! This can be done in realtime using the Geppetto player that adjust the controls, or by building animation timelines.
Creating animations
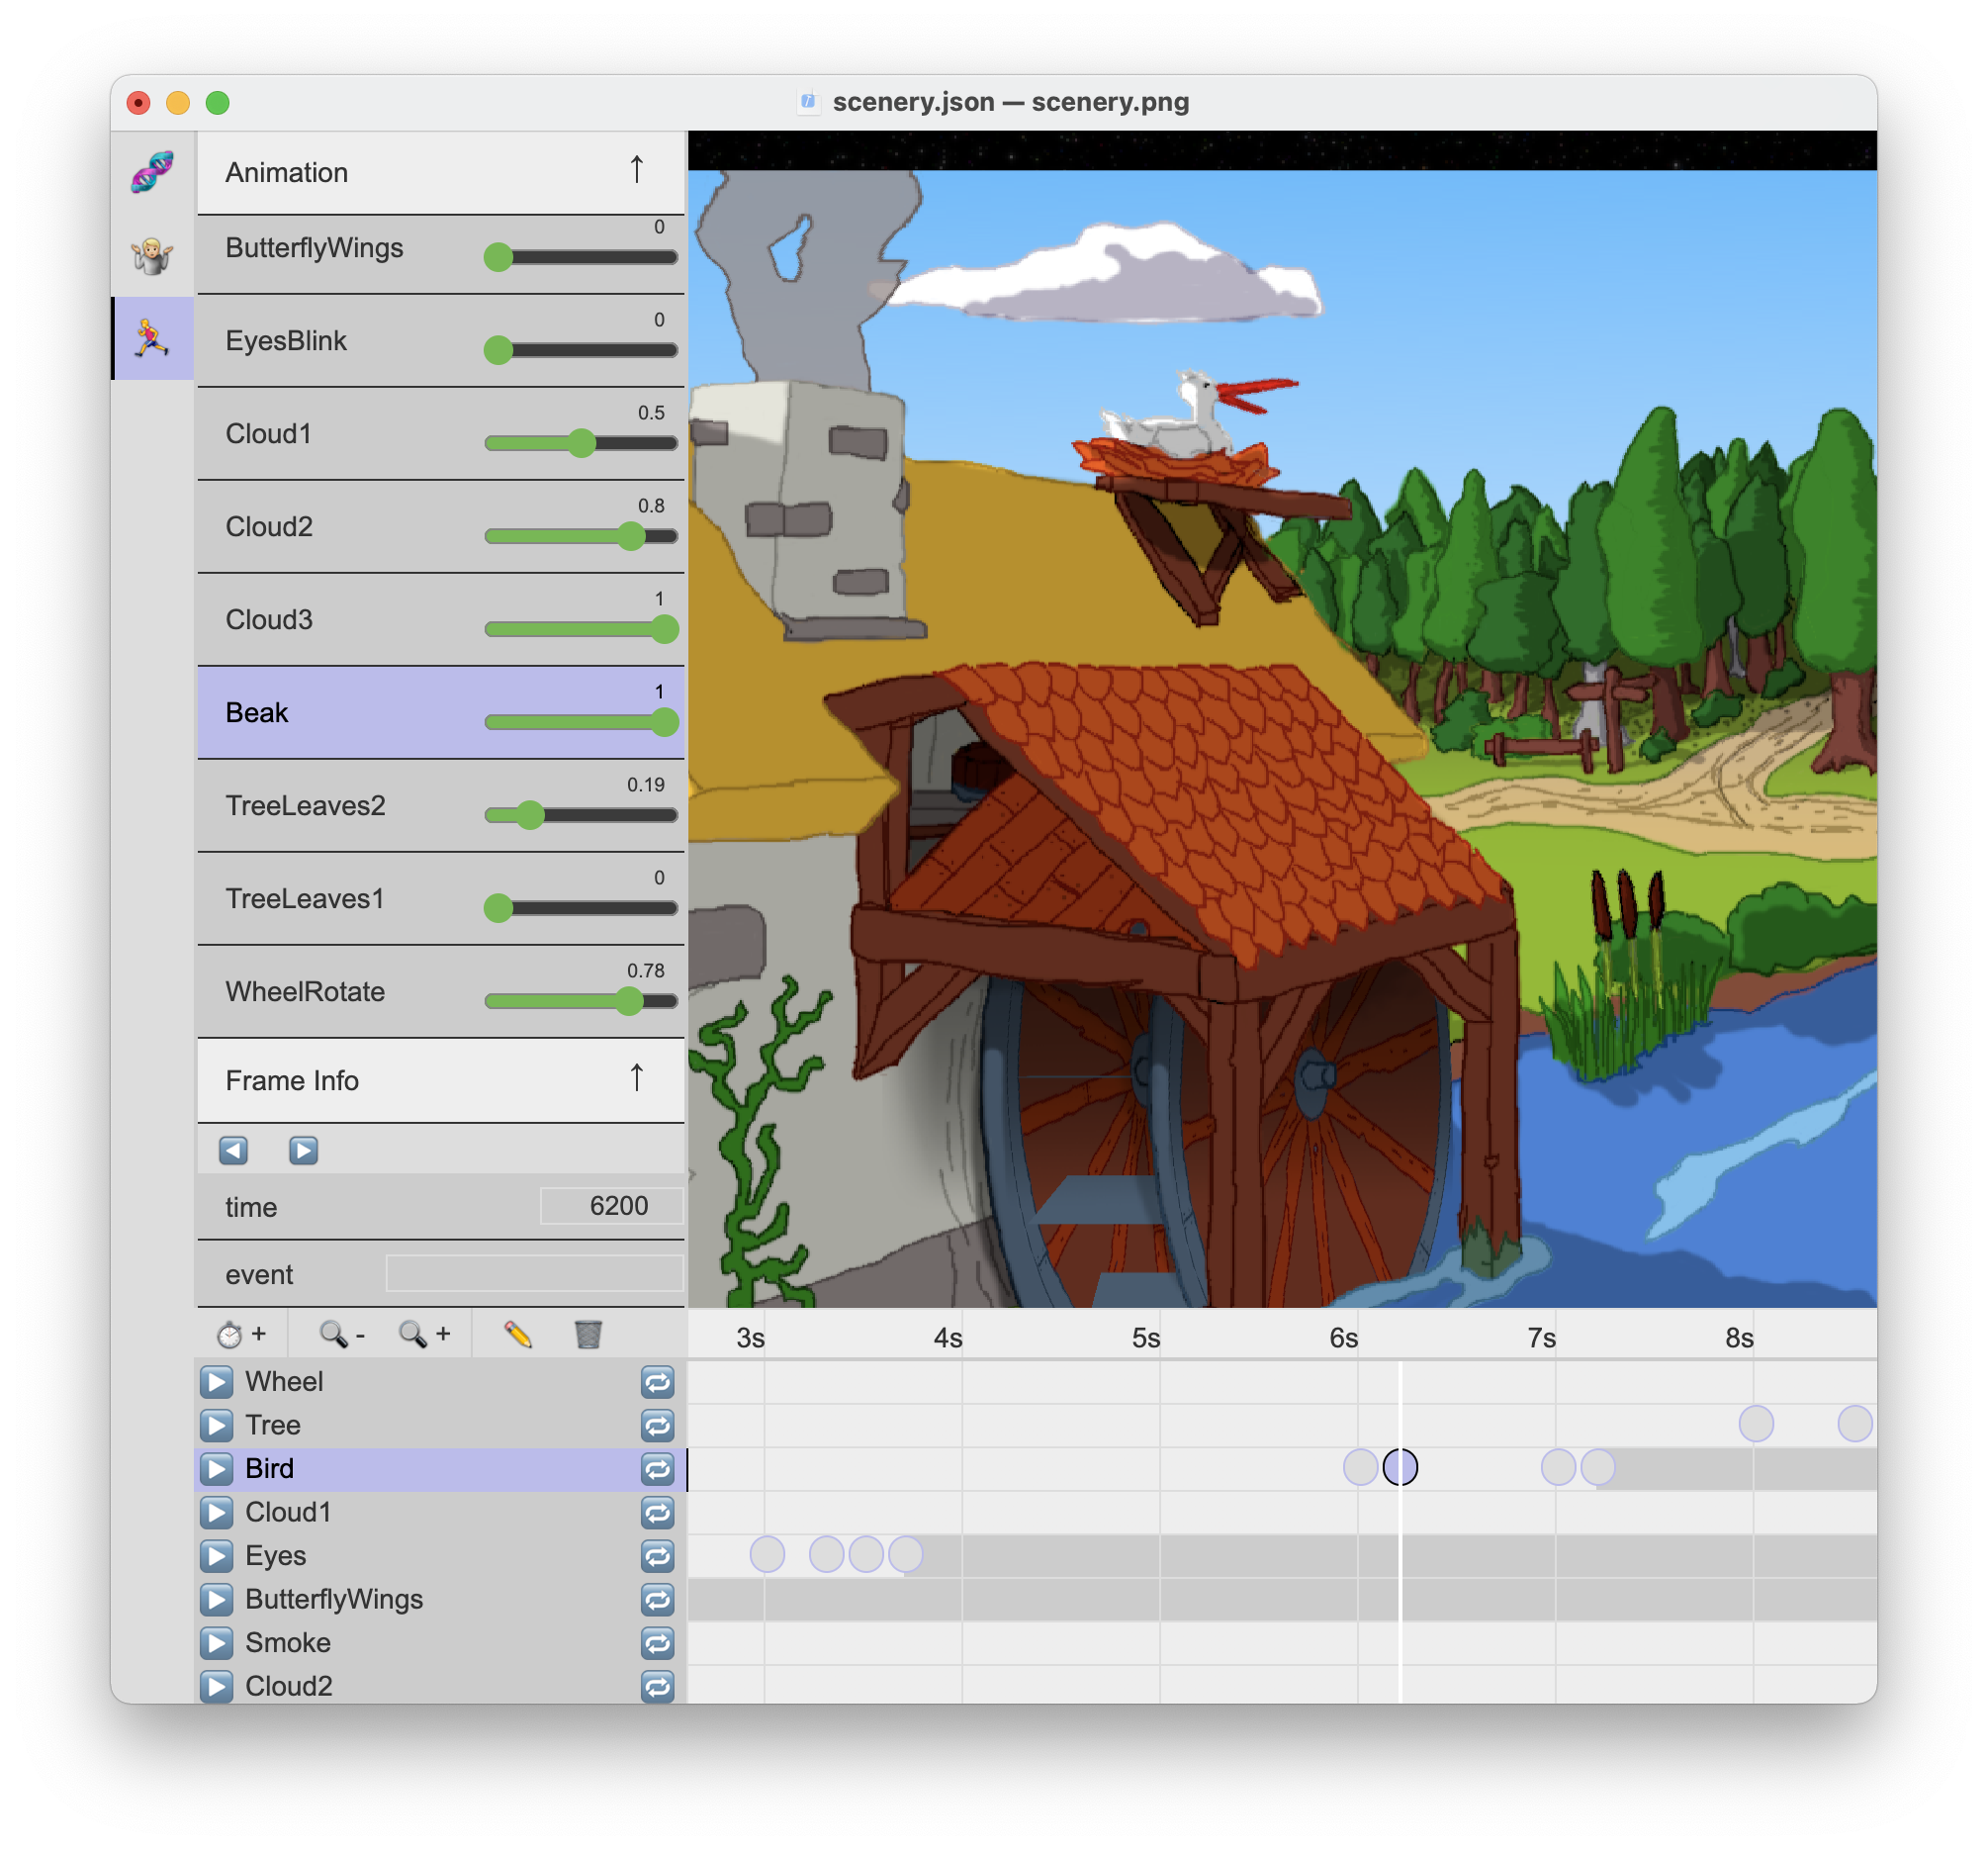
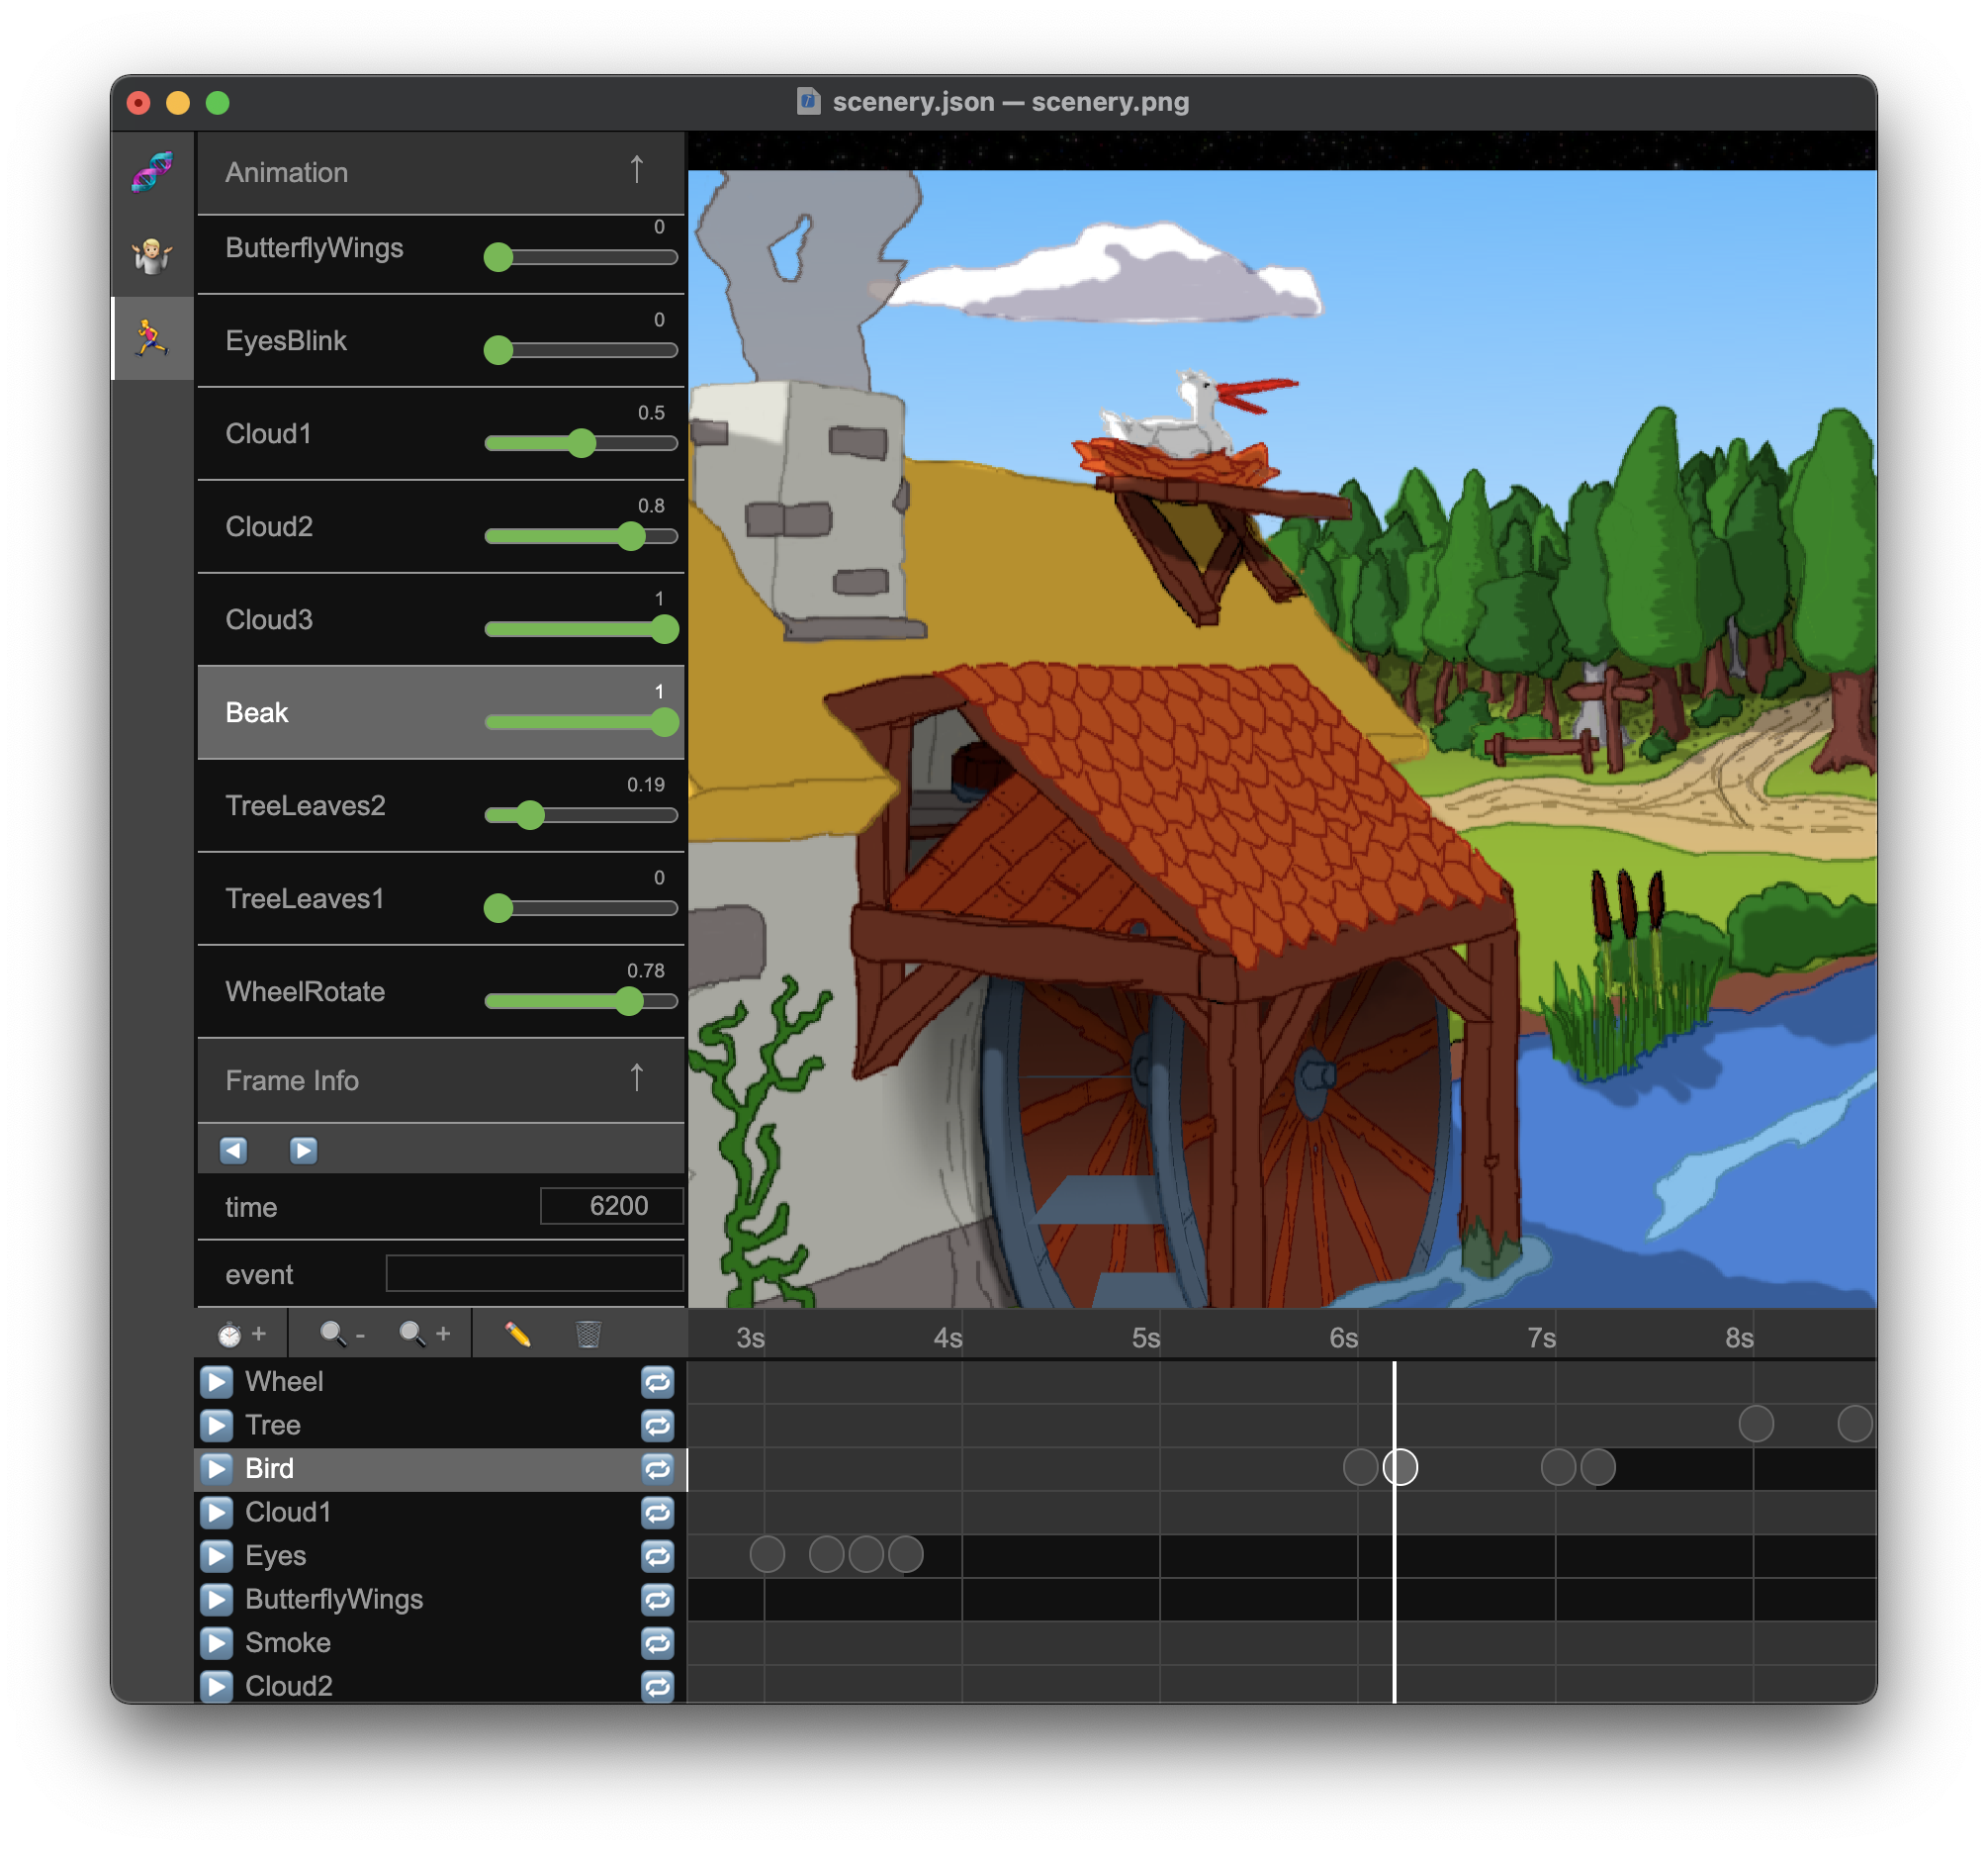
The animation screen is where you set up animations using controls defined in the Composition screen.
Animation tracks
Animation tracks can be played seperately from eachother. When an animation is using the same controls as an already playing track, the other track will automatically stop.
Animation menu buttons:
⏱ +Add a new animation track🔍 +Zoom in on the timeline for more detail🔍 -Zoom out on the timeline for more overview✏️Add a new keyframe on selected track🗑Remove keyframe when selected, or remove track when no frame is selected.
Creating frames
On a selected timeline, you can add a frame using the ✏️ icon. The position
in you click in the track will determine the time of the frame. You can manually
update the time with more precision using the frame detail panel.
You can set control values by clicking on a control item in the left panel and setting a value. By adding controls to frames and setting different values the animation track will interpolate between the frames creating an animation.
Custom events
Using the 'event' field in the frameInfo panel you can put a name that will be emitted by the player as event in the website. You can use these events for custom implementations, for instance to synchronise sound effects with the animation.